Create New Dimensions
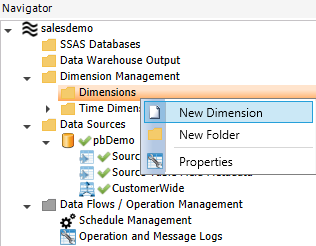
1. Right click 'Dimensions' from the Navigator pane under 'Dimension Management' and select 'New Dimension'.
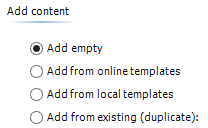
2. Select 'Add empty' and click 'Next'.
3. Type in a name and select a dimension type. Click 'Finish'.

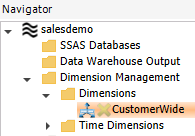
4. Your new Dimension should now appear under Dimension Management->[Dimensions.
5. Click on your new Dimension and go to Source Tables. Now click 'New' and select 'Data Source Table' from the drop-down menu. Click 'Save'.
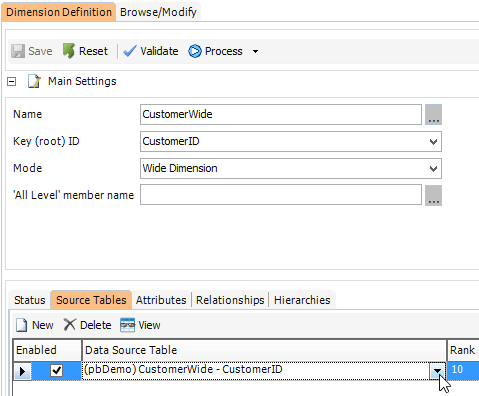
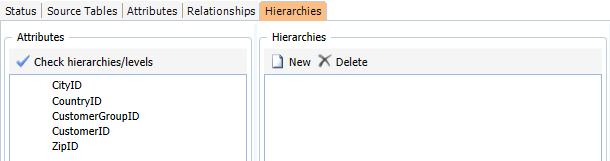
6. Select the 'Attributes' tab and click 'Check Attributes' to make sure that all columns are loaded.
7. Select the 'Hierarchies' tab and click 'New'.
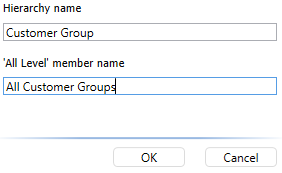
8. Type in a hierarchy name and an 'All level' member name, and click ok.
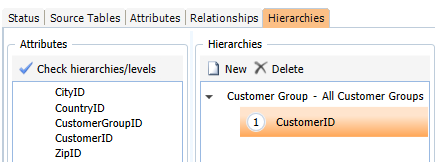
9. Now drag and drop the columns that belong in the new hierarchy.
-Notice the Primary Key column will automatically be added to every new hierarchy.
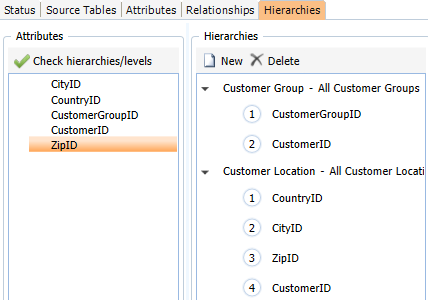
10. When all columns are leveled in the order you want, you may click 'Check hierarchies/levels'. Click 'Save' and then 'Process' when you are satisfied.
-Hierarchies can look like this for example:
Create New Time Dimensions
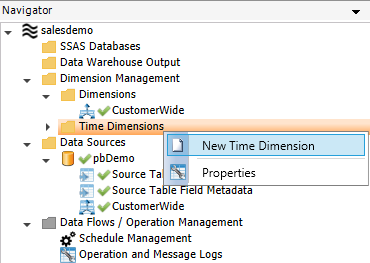
1. Right click 'Time Dimensions' under Dimension Management, and click 'New Time Dimension'.
2. Select 'Add empty' and click 'Next'. Type in a name and click 'Finish'.
3. Click on your new Time Dimension, and set the start and end dates.
-Note that information from any table that is dated before or after your set time range will not be noticed by Profitbase Studio.
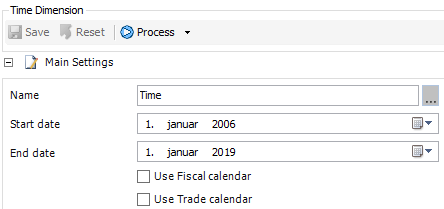
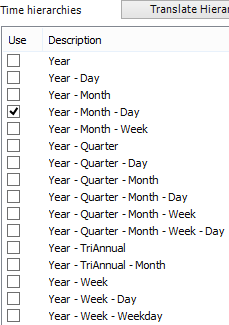
4. Select the 'Base' tab and select your preferred time hierarchies. Click 'Save' and 'Process.'
![]()
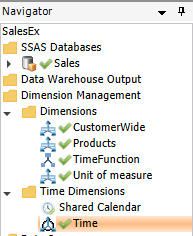
5. Your Time Dimension should now be visible in the navigator pane with a green checkmark.
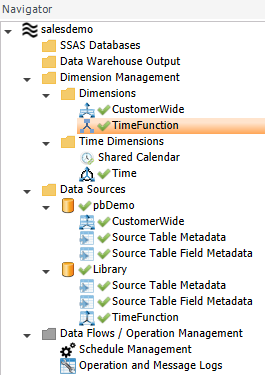
Create New Dimensions from the Resource Library - Time Function
Add Data source Table
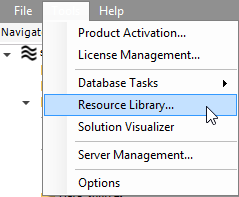
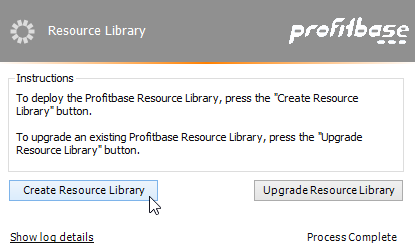
1. Click the 'Tools' tab, and then click 'Resource Library...'. Click 'Create Resource Library' in the new Window.
-Make sure the Resource Library database does not exist in the SQL server already.
2. Add a new Data Source, and make sure you select 'pbResourceLibrary' as Database.'

3. Process the Source Tables in your new Data Source.
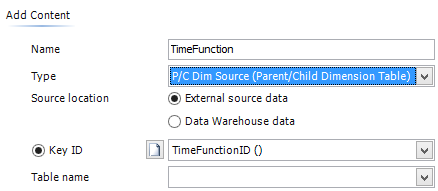
4. From the Navigation pane, right click your resource library Data Source and click 'New Data Source Table'. Name the data source table 'TimeFunction', and make sure you select 'P/C Dim Source' as Type. Make a new Key ID if necessary.
-If you do not know how to make a new Key ID; the procedure is described in Step 2 under 'Add New Data Source Tables' on the following page: Extract from New Data Source
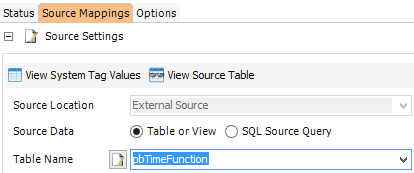
5. Now go to Source Mappings and select 'pbTimeFunction' from the list of Table Names.
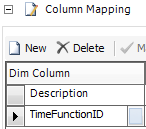
a. Create a New 'Dim Column' called 'TimeFunctionID'.
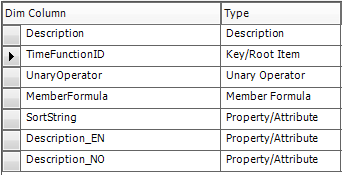
b. Add the following with the given settings under Dim Column and Type.
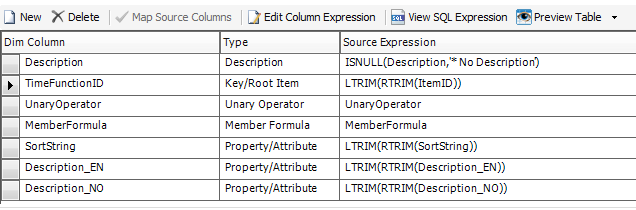
c. Drag and drop columns from the source table to populate the Source Expression column. Here you can see an example of a complete Source Mappings table:
d. Click 'Save' and then 'Process.'
Create the Time Function Dimension
1. Add a new Dimension called 'TimeFunction,' and make sure to select the dimension Type as 'Parent/Child'.

2. Click on 'TimeFunction' from the Navigator pane and type a Key ID.
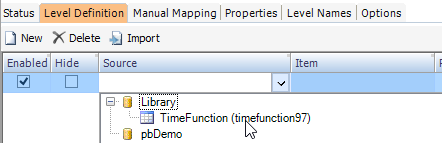
3. Got to 'Level Definition,' and select the TimeFunction table. Click 'Save' and then 'Process'.
4. Your Time Function Dimension should now appear in the Navigator pane with a green check mark.
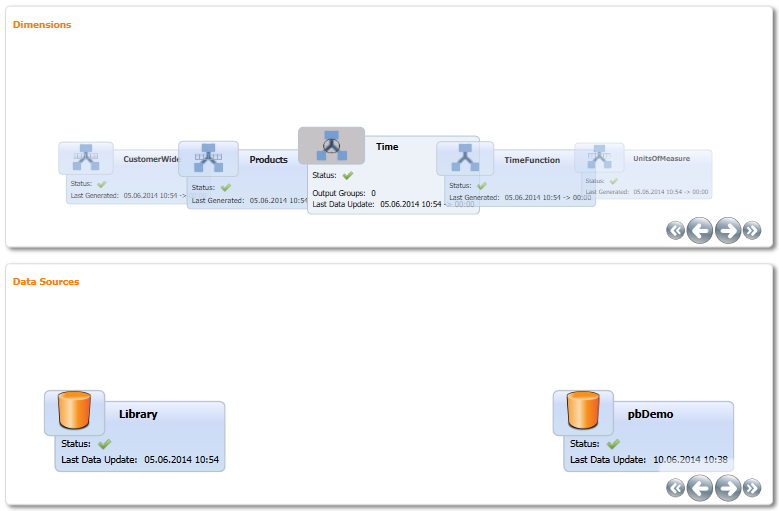
After adding several dimensions and connecting to different data sources you should be able to see your Dimensions and Data Sources in Profitbase Studio like this:
Information about Dimensions
To find more information about dimension settings and editing, click here: Dimension Management