Import csv files via PowerShell
CSV files along with XML and JSON files can easily be imported into a Profitbase Studio data warehouse by way of PowerShell scripts that does the job of extracting and moving the data.
This allows for very efficient loading of the data while SSIS is no longer a requirement.
Adding a new CSV data source:
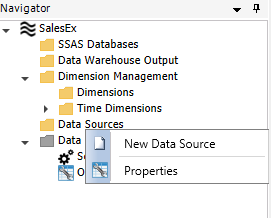
1. In the Navigator Pane; right click 'Data Sources' and then click 'New Data Source'.

2. Select 'Add empty' and click 'Next'.
3. Enter the name and type of your new Data Source. Click 'Next'.

4. Select 'Csv files via PowerShell' and specify csv file settings. Choose a 'Default File' and click 'View' to check a files row/column delimiters and text qualifiers. Click 'Next'.
5. Add a new data source table. Specify settings. Click 'Finish'.
6. View source file data by using the 'View Source Table' button and perform column mapping by drag dropping column headers in the data viewer into the Source Expression field.
Fringe cases like changing csv file names and customized load of one or several tables can be handled by way of using a script extension to handle the loading of data.
1. Click the 'Edit' button next to the 'File name' drop down list. Copy the PowerShell script that is displayed.
2. Add a new script definition of type PowerShell script.
3. Paste the script into the Script Command of the new script definition. Instead of the hard coded file name; drag and drop the SOURCEFILENAME tag into the place where the file name was. The SOURCEFILENAME placeholder tag contains the file name specified in the data source table in context.
4. To use the custom script extension instead of the default load mechanism. Add it as a script extension.
5. Check the 'Use Script Extensions to load source data' option.